Search This Blog

Thursday, September 29, 2016

DIY Wax Leaf Wreath

Fall is one of my favourite seasons; while it marks the end of summer
which always breaks my heart,
it is also the start of all of the Holidays and my most inspired seasons! 
My mom wanted a New fall wreath which inspired me to bring in a bunch of leaves and preserve them with wax ~ which you can find the tutorial for HERE
& have been going a bit crazy creating with them 

What You Will Need :

~ Waxed Leaves
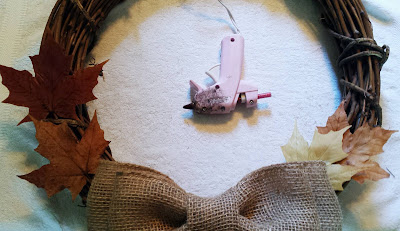
~ Hot Glue & Glue Sticks
~ Burlap Ribbon / Bow (optional)
~ Berry Branches (optional)
~ Vine Wreath ~ I have to give credit to my Dad for saving this wreath despite the fact that everyone in the Family thought it belonged in the trash!

How To :
Step 1. If you will be choosing to add a bow it is best to place it on the wreath where you want in (without attaching it) as a reference.
Step 2. Using your Hot Glue Gun very sparingly begin attaching the leaves to your wreath.
Step 3. Continue on with this process overlapping them slightly to ensure the wreath is covered.
Step 4. Continue until you are happy, whether you want the entire wreath covered or just a portion.
Step 5. Attach the Bow again using your Hot Glue Gun
.
Step 5. You can gently tuck Berry Branches in between the leaves for more dimension.

Gratitude Is The Best Attitude 

Tuesday, September 27, 2016

Preserving Leaves with Wax Paper DIY


This is a super old traditional way of preserving leaves, 

flowers & other plant life. 
It is by no means my tutorial but it is a skill that will come in handy
for the next #FriDIY project I intend on sharing later this week!

First things first ~ Get out there & collect some goodies to wax preserve!

What you Will Need :
~ Leaves , Flowers, other Plant Life
~ Wax Paper
~ Iron & Ironing Board 

How To :

Step 1. Insure that your leaves are thoroughly dreid - the fall mornings can get pretty muggy, leaving the ground & leaves very damp - make sure you leave them long enough to air dry OR dry them with a towel!

Step 2. Cut out strips of wax paper ~ to whatever length you feel comfortable working with!

 I suggest you do this as you go to avoid any waste

Step 3. Lay out a sheet of your wax paper on your ironing board.

Step 4. Carefully lay down your leaves etc.being sure not to overlap them.

Step 5. Place another sheet of wax paper over top (creating a leaf sandwich)

Step 6. Using your Iron at a medium heat (No Steam)
Begin carefully ironing the top (of the sandwich)
Flip it over & Repeat this process on the other side!
Step 7. Leave to cool .
If you intend on storing them for an extended period of time OR maybe you don't quite have the exact project in mind for them yet - You can leave them between the sheets of wax paper to store.

Step 8. When you are ready .. Gently separate the two pieces of wax paper & remove the leaves. 

They may get stuck in between the leaves but they will pull apart very easily. 

Gratitude Is The Best Attitude

Friday, September 16, 2016

'It's Just A Phase' DIY Moon T-Shirt Tutorial

This is the last weekend of Summer, which means that next week is fall. This also means many of us (especially those of us who live in places like Canada where the weather changes so drastically from season to season).
This summer I have been focusing on minimizing - in all aspects of my life, but the closet... clothes has with out a doubt been one of my biggest challenges. and this is not new for me to put it into perspective -  I have been talking about creating a capsule wardrobe since newly starting this blog... I think this may be the year it finally happens - Try and hold me to it!
So on that note ~ switching up your wardrobe does not have to mean going out and buying new pieces - the truth is most of us have more clothing than we actually wear!
So instead of adding to the problem why not solve it with a purposeful DIY, & remake something that we already have making it look fun & new! 
Supplies Needed:
~   Plain Black shirt
~   11 x 16 sheet of sketch paper 
~   Scissors 
~   White Acrylic Paint

~   Protractor / mason jar 


How To:
Creating your Stencil


Step 1. Depending on how many moon phases you want can fit on your T-shirt You will want to fold your paper into that many equal portions - this will make spacing your 'moons' much simpler! I wen with a 12 moon template - which required me to fold my 11 x 16 inch paper into 3 x 4 equal sections. 

Step 2. Using a protractor (or Mini Mason Jar) begin tracing a circle in the center of each section. 


Step 3. Once all circles are completed carefully cut out each one.

Creating your T-Shirt

Step 4
. I recommend placing a board or piece of cardboard in between the front and back layers of the shirt to protect from any bleed through that may occur.

Step 5. Lay your stencil / template down centered onto your T-shirt (The grid should help with placement as well). You may want to tape down your stencil to secure it into place!

Step 6 & Above
. Using a foam brush or loose paint brush you will want to gently dab on your white paint starting with a thin crescent moon shape and gradually increasing the portion of the circle you are covering with paint until you have covered the entire circle - Full Moon - and then gradually decrease the portion of the circle being painted in the apposing direction

Gratitude is the Best Attitude