I made this 3D Geometric Gem wall hanging last week, & after a lot of re-working of my original plan & a Re-Do or two (My cat who decided to partake was more helpful with the
de-constructing process); I am super happy with how it came out.
de-constructing process); I am super happy with how it came out.
There is so many fun & creative ways that you can style / display them from simply placing it on a table/shelf, creating a hanging display or mounting it onto the wall like mine (That will soon be a back drop) - I will be making many more! They are perfect for summer (which is just DAYS away) and if you used silver/blue(s) they would look like ice crystals! I am always striving to create my DIY projects out of materials I already have around the house, & you more than likely will to!
What You Need:
~ Paper Straws
*I recommend paper straws as they are much firmer/durable & will also take the paint much better than a plastic one would*
*I recommend paper straws as they are much firmer/durable & will also take the paint much better than a plastic one would*
~ Wire
~ Hot Glue Gun & Glue Re-Fills
~ Paint
~ Paint
~ Pliers / Wire cutter
~ Scissors
Step #1. Before you do anything else, you are going to start by painting your 15 straws. You could also use a decorative washi tape to cover them, for a much faster process.
Step #2. Trim three of your staws down to 6" with your scissors ( the remaining 12 straws should be left full length). This step can be done before or after painting your straws.
After your straws have been painted, left to dry completely & cut down to size, you can begin creating your DIY Geometric Art.
After your straws have been painted, left to dry completely & cut down to size, you can begin creating your DIY Geometric Art.
Step #3. Using your wire cutter, begin by cutting 8 lengths of flexable wire - roughly 4feet long (you want to be sure to have a fair amount of excess for maneuverability).
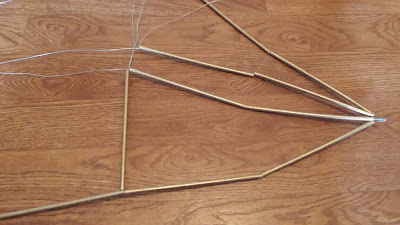
Step #4. Using pliers twist all of the wires together at one end - see image.
Step #5. Separate the wires into 4 sets of two, & thread on two full length paper straws.
Step #6. To create the horizontal lines on your Gem fold / bend the wire as tight to the bottom of the last straw as you can creating a right angle inwards as shown in the image below. Repeat this process with ONE wire from the first three sections ONLY!
Step #7. Thread the Three smaller straws that you had previously cut down to 6" into the folded wires. As shown below.
Step #8. Begining with the first of your horizontal(s) secure it in place by folding the wire creating a right angle again, (always making sure to keep it as tight to the straw(s) as you can) this time so that it meets up with the section of wire(s) next to it. & weave both wires together (as you did with the first sets). Repeat this process for all four of your sections. & again see the images below for clarification.
Step #9. Once your Entire template has been constructed you can begin folding the wire(s) into 3D shape, & securing the straws into place using your Hot Glue Gun.
I recommend starting where you began constructing and working your way up the Gem shape.
Step #10. Lastly, once your template has been folded into shape & the straws have been secured in place you can begin to gather all the wires; To create your final shape & secure it all into place simply twist the wires together just like you did in Step #4.
If you decided to display yours on a table or shelf than you're done, otherwise you can play around with coloured or sheer string or flowers to create a hanging display, or mount it to the wall!


No comments:
Post a Comment