Search This Blog

Thursday, February 13, 2020

When I Love You, I am Loving Me, because we are One

I hope that you choose to celebrate LOVE in whatever way feels right to you. 
I find that the idea of Celebrating in many different ways is embraced SO much more for other Calendar or Religious Holidays, than it is on Valentines!
The truth is, there is countless ways to embrace the feeling, mood,
& idea of Love!
 I choose to embrace and live the entire month of February, with a mentality to carry the spirit of being in love to everything I do, and the people I interact with. When I am truly being mindful of LOVE I find it, feel it in the tiniest details, and the purest - quiet moments.
 So tell me this... If 'The Spirit of Christmas', is something I can carry with me all year; This feeling of 'Embracing Everyday In Love' is something I could (& hope) to carry with me in the same way. 
Below I have shared a few of the ways that I have been,
 & plan to continue to do just that!
~ BE LOVE By: embracing the concept of Mindfully moving through your day embracing Love, & knowing that we always gain by giving Love.
"When I love You
I am loving me
because we are one"

~ Show Love to YOURSELF: By Waking up early, OR Sleeping in late (whichever would benefit you more), & Start your day by slowly enjoying your favourite Hot Beverage in a Cute (perhaps LOVE themed) Mug, You could even Mindfuly Colour the 'I Love You S'more" Colouring Sheet FREE PRINTABLE as you sip!

~ Spread Some love to those in your COMMUNITY: 

By hanging the 'Take What You Need:" Valentine FREE PRINTABLE

~ Share Love to your Galentines/Palentines/VALENTINES:

By snacking on chocolate covered treats, baked with Love!

I was absolutely spoiled with Rose-Pink Vanilla Bean Marshmallows from Mars-Mallows - a Locally owned Marshmallow Candy Business; run by a very driven elementary school student, Marlo Benson- with help from her Momma, Alicia Benson (who just so happens to be a very dear friend of mine)! I loved having them to put out on the weeks leading up to Valentines day, to share with those I hold dear. Enjoying them in a cup of Hot Chocolate will truly Warm the Heart, and they make the CUTEST addition to your Hot Chocolate Bar.


Marshmallows By Mars-Mallows: FACEBOOK 
Photos By KM Photography: INSTAGRAM / FACEBOOK
Styling By Upcy: INSTAGRAMFACEBOOK 

Saturday, November 2, 2019

Our Engagement - A Humble Love Story.

Aug 2018 - Forever Starts Now
Engagement Photos by Kristen McNish

With my Best Friend there to capture photos; everything I had been hoping for came true before my eyes.

The Backstory - I met Cody When I was just 15 years old, he threw me my Sweet 16 &, We Celebrated Graduating High School & years later College together. Growing together, but separately - we saw years of our Relationship living separately, sometimes an entire country between us. We spent years of our life together. He returned from a cross Canada Tour, was there to see me Graduate from College, & we moved in together in our own tiny apt in Ottawa. He attended College himself & I got to be there to celebrate him too! We moved back to the town we met in, the town we got engaged in, The town I would become his Wife.
I grew up watching Romantic Comedies, I have always been a romantic. Cody said to me the other day that when it came to love languages I was multi-lingual! I just love Love & always have, but I never imagined I would meet the love of my life in High School, a fellow lover of Romantic Comedies.One of our very first conversation was about the book Angus Thongs & Full Frontal Snogging ; & I will never forget the way I felt when he referenced it.
11 Years  (now 12) with this man  by my side chasing our dreams & tackling life together. I often dreamed of a day that he might ask me to marry him, but I honestly never Imagined that I could feel as full of love as I do!
I so Grateful that he even thought to have my Best Friend Kristen there to shoot the entire thing. I have a photo from our very first date (which I will share below) & it blows my mind how different we look & yet how similar the photos somehow are. - Neither of which where staged, but captured by friends in the middle of real moments.
It will be such a blessing to have these photos to look back on, in the years to come, as I do with so many of our other photos now!
Photo by Hannah x Camera (in High School)


The Engagement -

What I thought would be a photo shoot with my Best Friend Kristen McNish in the Forest, (something we do quite frequently) turned into something else entirely. Truthfully! (Cody had been acting a little bit strange for a few days - but I was so oblivious to all of the details until after.) He had been out to visit my Parent's ... without me...(so unlike him). now he is VERY close to my Parents, but he doesn't go and visit them without me.... or hadn't until this time. He went to ask for my hand, he knows that I am a traditionalist in many ways, and that this would mean very much to my Parents, & I. Kristen arrived to my house & I was dilly-dallying around (as I do) - She was quick to rush our 'photo shoot' along... (so unlike her). We got into her Car & began to drive down the road to Mac Johnson Wildlife Conservation . Looking back I remember she was Silent. She wasn't even singing along to the Radio with me ... (so unlike her). We parked close to our favourite spot. Kristen kept trying to make me lead, (to give this some context - if you don't already know, I have absolutely NO internal compass. I could get turned around and lost in my own forested back yard, or lost in the tiny 6 block town I spent my whole life growing up in). & she was insisting I lead our way to this secret spot we found... in the middle of a Conservation Area... Needless to say, I was frazzled, turned backwards, asking her Where Do I Go?? Straight ?? Keep going Straight?? She already had her camera pulled out... (she doesn't usually walk through the forest with her camera out EVER -- Another detail, or clue missed in that moment but remember so clearly looking back). I saw the way the forest opened up in front of me and for one brief moment I relaxed. I wasn't lost & confused anymore, I knew where I was. Then I saw him... Down on one knee... Dressed up Cargo pants, & a Collard shirt. I knew what was happening, but something took over me. My ears started to buzz, & then they shut off. I couldn't hear anything, I couldn't move. I just stood there. Stunned. I had waited 11 years for this moment, I had dreamed of it a billion times, & I was still so unprepared for what was about to happen. I was still just standing there, Kristen tried to encourage me forward (likely into frame). Cody had set up all of these lanterns just up the path.  I didn't move.  Cody stood up & walked over to me, he wrapped his arms around me and gave me a massive hug. He looked at me, in the sincerely sweetly way he does & then he walked over & got back down on one knee. He spoke the most beautiful words to me & I truthfully didn't hear them in that moment. I am forever grateful he had them written down, & that he let me read them later -- after I had calmed down a bit) He had my favourite song by our dear friend Korey Purdy playing softly in the background. A song I am so grateful he played live for us at our wedding, as we signed our marriage license.
He asked me to Marry Me. & I said yes!!!
I was just gushing with excitement & Cody asked me on our way to the car, If I wanted to go out & tell my mom! I Jumped at the Chance! Just as we were about to pull out of the parking lot my Mother pulled in!! I Jumped (again) this time out of an almost still moving vehicle & right over to her!
We hugged & cried & celebrated together in the parking lot, & then went for Coffee. It was perfect.

Sunday, November 25, 2018

How To Hand Sew - Beginner Hand Sewing Guide

Last year at about this time, I began work on what is as of today, my longest project (taking over a year to date) my largest project,
& my longest lesson,
& biggest learning experience, in an art project.

The project contains many small steps - repeated in concession. & while I don't want to give away entirely too much (though if you do follow along on Instagram, the most minor investigation skills would lead to you figuring out what I'm referring too).

I have decided to begin sharing some if the smaller Tutorials for the skills that would be required. I am going to begin with a D.I.Y. Beginner Hand Sewing Guide. I love getting requests from you guys, & jumped on my gals suggestion to share this with you guys! I have put together a list of 3 Basic Stitches, each with their own list of benefits, & uses. 

While the Tutorials below are for THREE Stitches - You will in reality be learning 5 Variations of Stitches! The Skill sewing by hand is something my Mom taught me at a very young age. I learned so many Skills that I will forever be Grateful for, while watching her over the years.

The Running Stitch & The Taking Stitch
The Back Stitch
The Blanket Stitch
& The Edging Stitch
This Stitch was taught to me in Art Class - while making DIY Cards; by a women (Sam Crosby) I was blessed to have Teach me Dance, Vocal Lessons, Coach, Choreographer, Grade 8, & many classes in High School.


Thread The Needle & Lets's Get Started

Stitch #1 ~ The Running Stitch : is in my opinion the simplest, yet most versatile & useful stitch. Simple variations to the stitch allow for an endless amount of different uses, incredibly great for adhering patches, seems, hems, & button application.


How To :


Rule Of Thumb: Always Begin by piercing the fabric from the back side, & pull until the knot meets the fabric (this will insure a hidden knot).
Create a small space and pierce through the Fabric this time from the Front to the Back, 
pull taught.
Repeat the stitch again from the Back of the Fabric to the Front (as you did the first time), and pull taught.
Continue This Back to Front - Front to Back Stitch Pattern.

A Tacking or Basting Stitch : is identical in technique to the Running Stitch just with longer gaps between stitches. It is used to temporarily attach fabrics, instead of using pins.

Stitch #2 ~ The Back Stitch : A very strong hold stitch, great for added strength, & adding details on seems, patchwork, & even embroidery.


How To :
You will be doing exactly what the Name says - Stitching Backwards. Stitching in a Right to Left, direction. Begin From the Back, but begin where you would Imagine a single Running Stitch would end. 
Cary the stitch back in the left direction. This time Stitching Front to Back. 
Pull Taught.
Repeat this Process, Stitching again from the Back - beginning at the left side of the Stitch again,
Stitch Back to Front (going in the same hole as the Stitch previous (as shown above). Pull taught.  
Repeat this Right To Left stitch pattern.


Stitch #3 ~ The Blanket Stitch : 
This is a bit of a more complex hand stitch, but it is one that I think is so beautiful & is a great skill to add the perfect finishing touch to your sewing project(s)
The first step of this stitch is actually a stitch of its own entirely (The Edge Stitch). So your technically getting 2 skills for the practice of 1.


How To :

Beginning from the Back (always).
If you are attaching more than one piece of fabric to the other, Begin the first Stitch by piercing your needle through the top layer pf fabric only, this will create a hidden knot & first stitch. 
Bring the needle in an upwards motion, and wrap around the edge of the fabric to the Back side. Piercing through exactly where you began from & pull until there is about a 1/4" loop - with practice you will be able to shrink the size of the loop but for practice sake this is a great rule of thumb.
If you were to pull it tight This in essence - repeated - is an Edge Stitch... but in not basic fashion we are NOT done there...
To upgrade & finish The Blanket Stitch - simply tuck the needle in (a backwards direction) under the loop. 
Repeat this process - with the second stitch & those after will began at the back of BOTH pieces of thread. 
Practice getting your stitches as evenly spaced deep & spaced apart.

Sunday, November 11, 2018

Sweet & Salty Roasted Pumpkin Seed Recipe(s)

With the days growing colder now that we are deep into Autumn, I am starting to crave quite time spent at home. Getting organized for the Holidays, planning for our upcoming wedding, cooking & baking. Now that the heat is on, and summer is a thing of the past,  I'm longer am avoiding turning my stove on at all cost! With Wedding Season & my cosmetic Bookings wrapping up for the year, I have more time to spend working creatively, trying new Recipes & attempting/ learning new Craft Skills. As the weather continues to cool, I will spend more & more time in hibernation mood - nesting & creating, so be sure to keep your eyes out for NEW DIY Tutorials  & Christmas Inspiration coming to the Blog very soon!
I love this time of year - what I refer to as - Celebration Season! While carving pumpkins this year, I mentioned to my friend that I had never had pumpkin seeds! She was super shocked, & suggested I save the seeds we had just de-gutted out of 4 pumpkins & put them to use, ensuring me that it was super simple to do!
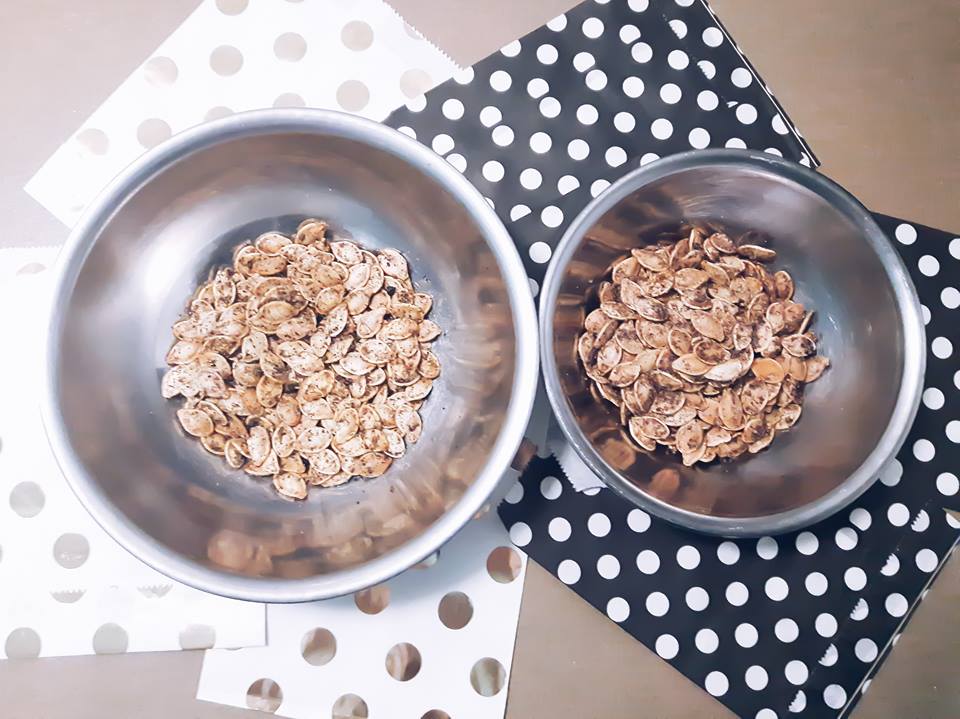
I decided that since I had SO many seeds, I would practice different flavor combinations! After taste testing a few different kinds. I have selected my favourite SWEET & SALTY Roasted Pumpkin Seed Recipes!


Begin by collecting all of the seeds from the center of a Pumpkin & place into a large mixing bowl.
This recipe is for 1 Average Sized Pumpkin - which I found yielded roughly 1cup of Seeds.
Fill the mixing bowl with cold water. Let them rest for 30min-1hr.
Using your fingers carefully sift the seeds off the top of the bowl.
You will notice the water is now quite a vibrant shade of orange & loaded with pumpkin fiber.
Cover a baking sheet in napkins/paper towel & spread your seeds out as evenly as possible. Let sit for 5+hrs (or leave overnight) to ensure that they have dried out completely!!
Preheat oven to 325. Line a large baking sheet with parchment paper or use a non-stick/silicone baking sheet.
If you are making two flavors of Seeds, separate into two 1/2 cups bowls & Add 1 tbs Avocado Oil into each. Mix Well.
If you are only making 1 flavour add 2tbs Avocado into 1cup of Seeds. Mix well
Prepare you seasonings / Flavour Mixtures.
TEX MEX Seasoning RECIPE:
1tbs Tex Mex Seasoning
1/2 tbs Salt


Cinnamon Sugar Seasoning RECIPE

1tbs sugar(s)
1/2 tbs cinnamon
Mix Well.
 Spread Seasonings over Oiled Seeds. Mix Well.
 Spread flat over a baking sheet.
Place in [350 Degree Preheated] Oven. Set Timer for 15min.
 Remove from oven & Stir/Mix.
 Re-flatten over tray.
Place back in oven. Set Timer for 10min.
Remove From Oven & into a bowl to cool.
Package, & Share!
Eat & Enjoy!!!

Sweet & Salty Roasted Pumpkin Seeds Recipe

PREP TIME: 30min    COOK TIME: 25min    TOTAL TIME: 55min    DIFFICULTY: Easy

Depending on if you prefer to make the [Salty] Tex Mex or [Sweet] Cinnamon Sugar Variation the Prep and Cook time will be identical & the only difference is which spices / flavors you add come that Step of the Recipe.

INGREDIENTS
Pumpkin Seeds [1CUP]
2tbs Becel Avocado Oil
TEX MEX Seasoning RECIPE:
1tbs Tex Mex Seasoning
1/2 tbs Salt
Cinnamon Sugar Seasoning RECIPE
1tbs sugar(s)
1/2 tbs cinnamon

INSTRUCTIONS
Begin by collecting all of the seeds from the center of a Pumpkin & place into a large mixing bowl.This recipe is for 1 Average Sized Pumpkin - which I found yielded roughly 1cup of Seeds.Fill the mixing bowl with cold water. Let them rest for 30min-1hr. Using your fingers carefully sift the seeds off the top of the bowl. You will notice the water is now quite a vibrant shade of orange & loaded with pumpkin fiber. Cover a baking sheet in napkins/paper towel & spread your seeds out as evenly as possible. Let sit for 5+hrs (or leave overnight) to ensure that they have dried out completely!! Preheat oven to 325. Line a large baking sheet with parchment paper or use a non-stick/silicone baking sheet.If you are making two flavors of Seeds, separate into two 1/2 cups bowls & Add 1 tbs Avocado Oil into each. Mix Well. (If you are only making 1 flavour add 2tbs Avocado Oil into 1cup of Seeds) & ix well .Prepare you seasonings / flavour Mixtures.

TEX MEX Seasoning RECIPE:
1tbs Tex Mex Seasoning
1/2 tbs Salt
Cinnamon Sugar Seasoning RECIPE
1tbs sugar(s)
1/2 tbs cinnamon

Combine All ingredients in a small bowl & mix Well.
Spread Seasonings over Oiled Seeds, mix Well & spread flat over a baking sheet. Place in [350 Degree Preheated] Oven. Set Timer for 15min. Remove from oven & Stir/Mix. Re-flatten over tray.  Place back in oven. Set Timer for 10min. Remove From Oven & into a bowl to cool.
Package, & Share!
Eat & Enjoy!!!