Search This Blog

Monday, October 30, 2017

DIY Unicorn & Meadow Costumes


Happy Halloween Week!


I remember when Halloween used to mean dressing up with all of your best friends and siblings, grabbing the largest pillow case you could get your hands on and hitting the streets until your parents called "Last House". At this point it was home to the living room to bump out ALL of he loot we had acquired. Am I the only one who used to sort it all out item by item? I even went so far as to dump all the sour candies into one zip-lock bag. Now it's just drinks the weekend closest, handing out the candy we once collected. I won't lie, this is going to be my first year handing out candy (from my own home) & I am actually DO excited about it! & then scoring as much as our inner child wants the morning of November 1st when it ALL goes on clearance!

This month has been quite the whirl wind for me personally. I fell sick with at the start of October & spent the days surrounding my Birthday at the hospital. Just as I began to feel like myself again our house got hit with an awful cold/ cough that just can't take a hint that its unwelcome here!
But with the bad there is always good, like celebrating a relaxing Birthday & Thanksgiving with Family & cake. Getting new glasses. Sight is something I am VERY Grateful to have again, & seriously had no idea just how much of the worlds beauty I had been missing without them! I am having mixed feelings about the fact that I now have to sport glasses daily to have said vision.. It will be nice to no longer unknowingly ignore people in public who are out of my 2 foot vision radius.
I
n any case, I think we could all use an excuse to let go of ourselves, the stresses of life and anything that might be bringing you down. Let's play dress-up for a while like the old days!


This is the first holiday in our new home & being back in our hometown again, & I think the fact I started decorating for it in September means that I was a pinch excited!

 Tomorrow is Halloween Night & if you are still deciding on a costume you can find 12 last minute costume ideas HERE & HERE, as well as flawless cosmetic costumes HERE


The Galloping Dead
(Zombie // Dead Unicorn)

Self Love Cultivated Through ; Self Love, The Process of Art, & An Attitude of Gratitude 

Friday, October 27, 2017

Undead Mermaid Coffin Wreath & Halloween Decor

This year I wanted to switch it up from the traditional Halloween colour scheme. Summer was so slow to arrive & with how mild the start of Fall has been I wanted to add a Pop of colour & whimsy! We spend a lot more time in the space in the Fall compared to the Summer, but I wasn't quite ready to say goodbye to the Beach ... or fully invest in the Deep Fall Tones. 
I decided on an Undead Mermaid Inspired Theme. I figured this was the best of both worlds allowing me to include neon and pastel colours, as well as things that would hold onto that Summer mood a bit longer, like Seashells & Coral! While also leaving room for me to introduce as much or as little Horror / Creepy Halloween vibes as I wanted! 

I do love the classic look of the Traditional Fall Colours, and Orange and Black Halloween classics. Like not wanting to fully invest in Fall, I also didn't want to invest too much into a slew of new / different decor pieces. I decided to up-cycle a few items I already had that I hadn't made use of in years prior, because while I do carry-over some items year to year, I do like to switch things up. My rule of thumb is that if it wasn't used in that season the year prior it likely will not be used again (as is) & is ready to be re-worked into something new!
Some thing's take more work than others... I challenged myself at the start of this project to make use of what I already had as MUCH as possible, included but not limited to using packaging as a base.


Supplies Needed:
~ Needle
~ Scissors
~ Pom Poms
~ Cardboard

~ Paint Brushes ~ Small Notebook
~ Finishing Thread
~ Paint (mix of colours)
~ Hot Glue Gun & Refills

~ Plastic Skull & Bone Beads

How To: 


I simultaneously gave a quick sprucing to a bunch of super inexpensive plastic mini pumpkins I found in my Holiday storage simply by applying a few coats of paint in pastel colours.

 The Wreath was made with deconstructed pieces of this weird Skull Necklace Thingy I also found in storage - not even sure why I had this or where it came from, maybe some forgotten costume of the past.

Painting Prep

Step 1. After taking the Skull & Bone Beads I gave them a few coats of paint with the same pastel shades!

Step 2. The Wooden Coffin will also need to be painted. ( I went with a bright blue with a teal undertone )

Creating Details 

Step 1. Using a Needle & your choice of finishing thread, thread Pom Poms, as well as Skull, & Bone beads.

Step 2. 
Continue this process until you have created 2-4 various lengths of hanging whimsy (as seen below)

Tassels Made Easy. 

Step 1.
Wrap some finishing thread around a notebook about the same length width as you would like your tassel to be long. Wrap more, or less to create a larger, or smaller Tassel.


Step 2. tuck a piece of finishing thread under & pull through. Drag to the bind of the book & tie tight to secure.

Step 3. (not pictured) use scissors to cut your tassel Free, Fold over at the secured point and wrap in a small piece of finishing thread of detail ribbon to finish. 


Prepping the Coffin 
Once painted I was free to add the details of whimsy, I had originally planned on including some seashells, but the ones I had ended up being a bit too heavy & wasn't ready to risk the whole thing smashing to the floor (or onto my cat who often lays RIGHT in the doorway) I added some bright feathers, which I just really liked the colours of & the way the softness looked against the crudeness of the casket (not something you read often here, or anywhere)

Step 1. Using Hot Glue I quite literally glued the piece of card-stock that my PomPoms had originally come in to the back of the coffin across the top!

Step 2. The feather were actually Clips, which made attaching them very simple!

Steps 3/4.  Cut off ANY access / exposed cardboard from both sides (don't want to ruin the illusion)

Step 5. Using your glue Gun again, apply a small dollop of glue where you would like your 'details' to hang from.

Step 6. Tie a small loop of finishing thread and secure it to the top (back) of the Coffin to hang.


Step 7. Write a cute / creepy / top secret message inside for anyone who dares to Open!!!

Friday, October 20, 2017

DIY Dripping Blood Halloween Choker Necklace


Halloween is right around the corner, but don't whip your head around too quick to check your agenda or you might lose it.
Chokers are like having the dream of the 90's alive or i guess in this case dead around your neck.

What You Will Need:

~ Pliers
~ 2 o-ring
~ Safety Pin
~ Paint (red)
~ Paint Brush
~ Eyelit Clasp
~ Hot Glue Gun
~ Chain Extender
~ Hot Glue Sticks
~ Wood / Non-adhesive surface (to work on)

How To:

Refer to the photo above for a photo reference for each of the 12 Steps.
Step #1. Begin by marking / drawing a 12" straight line across the length of your Non-adhesive work surface.

Step #2. Apply beads of Glue of varying lengths. Beginning away & working towards the marked line (this will give it a dripping effect).
I chose for mine to be in the center ONLY but the design choices are yours to make!

Step #3. Beginning at one end of your 12" line create a single bead of glue the entire length.

Step #4. Allow it to dry completely before gently peeling it Free from the surface below.

Step #5. Paint it (Red). It's at this point that it starts to look graphic. 

Step #6. Use your safety pin to safely puncture a hole through each end of your choker.

Step #'s 8 - 12. Grab your pliers and use them to open & loop one through each hole.
Put an eyelit clasp on one, and the extender chain on the other
 (depending on if you are right or left handed, the sides you prefer to attach these to may differ)
Use your pliers to secure the o-rings tightly together again.
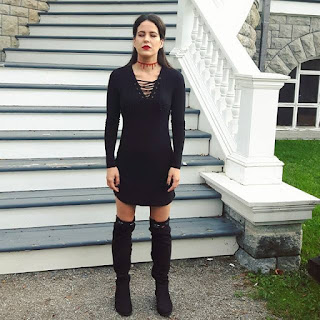
Get your Spook on!


Photos shot at Fulford Place.
 Self Love Cultivated Through ; Self Love, The Process of Art, & An Attitude of Gratitude 

Tuesday, October 10, 2017

DIY Pom Pom Heels


Long Weekend's have a way of making the weeks fly by, It's already hump day!
I made these DIY Pom Pom shoes as a gift to myself for my Birthday. 
I actually saw a pair of shoes that inspired these by Steve Madden that were entirely out of my price range for a pair of fuzzy pom pom shoes that I would likely wear one time and adventure so hard that the Pom Poms got wet or dirty leaving them forever ratty looking & likely reaming in the back of my closet for the rest of our time together! 
This is when the Idea to DIY my own at a fraction of the cost busted to mind. I already had the black heels & get a fair amount of wear out of them at work on a day to day bases. The fact that I was still wearing them as they were & the aforementioned cautionary tale in mind I decided to make the Pom Pom's remove-able!

What You Will Need:


  • Heels
  • Pom Poms [these are actually hair ties, but they are ideal as they come in a pack of two]
  • 2 Bobbi Pins
  • A piece of card stock / paper
  • Hot Glue Gun & Glue


How To:
Step 1. Begin by sliding your Bobbi Pins onto the piece of card stock - this will act as a barrier insuring that it does not become glued together.

Step 1.5 Eat something tasty.

Step 2. Apply a small amount of hot glue to the side of the Bobbi Pin that is beveled.

Step 3. Secure a Pom Pom to the Top of each Bobbi Pin

Step 4. Slide Bobbi Pins onto the front of your shoe & you're celebration steppin'!

Self Love Cultivated Through ; Self Love, The Process of Art, & An Attitude of Gratitude