Search This Blog

Tuesday, November 28, 2017

DIY PomPom & Tassel Toque


The cold hits quick here in Canada. One minute you're Fall vibin', plaid and all... but with one sharp North wind it's nothing but scarves that double as king size blankets & boot gains!
The repetition of layering on the same bulky gear every day makes me wonder why I even bothered changing my outfit from the day before - or out of my pajamas for that matter!
This year I decided to give those boring basics we NEED for warmth some flair & personality!
Maybe this will make me more excited to get dressed up for the cold - I'll at least look cuter while complaining!
Kristen & I got all snuggled up in them and head down to the stream by her house, we should have headed the warning of the frozen water caps... we got like 10cm of snow the next day!

What You Will Need:
~ Hats
~ Yarn
~ Thread
~ Needle
~ Scissors
~ Pom Pom(s)

How To:

Step #1. Begin by creating your Tassel(s). Wrap yarn around a small notebook (or your hand) 25-50 times (depending on the size of Tassel you are looking to create). [Image 1]

Step #2. Tuck a piece of yarn under all & tie at the top to secure [Image 2]

Step #3. Using your scissors cut the apposing ends Free. [Image 3]

Step #4. Tie another piece of yarn around the Top of the Tassel to complete [Image 4]

Step #5. Thread your Needle and Sew one end of it into the Top of your Hat (at the base of the Pom Pom if there is one). Leaving a 5-10" thread attached to the needle. [Image 5]

Step #6. Thread on your Pom Poms, be sure to do this loosely (with space in between so they don't look squished). [Images 6 & 7]

Step #7. Sew on the Tassel at the end. Tie off to secure & cut off the needle & excess thread.
Again be sure to keep a relaxed hand while doing this. [Images 8 & 9]

Now Pop it on your Head and Tassel your way around Town!


Self Love Cultivated Through ; Self Love, The Process of Art, & An Attitude of Gratitude 

Wednesday, November 15, 2017

Fall In My Bag [2017]

Organization & practicality are two things I have been doing my best to embrace in every day life! The more control & organization I can implement into the aspects of life I can control, the easier it is for me to let go & accept change as it comes to the other areas of my life I can not control. In the summer I shared how I manage an active and on the go summer lifestyle, chasing passions, all while working a day job & limit the amount that I look like a disheveled bag lady while doing it. Now that fall is here & the cool weather has rolled in I am going to share with you how I keep my everyday handbag organized. I think it is safe to say that I am not really into the deeper fall tones this year. At the moment I am loving on everything holographic & monochromatic! 
I am sharing how I incorporate my obsession with zip-bags to keep things sorted & accounted for. One for First-Aid, Cosmetics & of course coffee coins so all that useful content can be easily found and USED! Not forgotten or buried under mountains of old receipts and lip products leaving you digging through your purse at the check out.  


  • Silver Metalic Wallet/Wrist-let (Chamilia No longer Available - similar HERE)
  • Plastic / Rubber Bag First Aid Kit  (Actually a pencil case I scored during the Back To School Frenzy)
  • Two-tone mermaid scale & black Sequin Coin Purse/Wrist-let (I got as a gift but is No Longer Available - I did find it in a Fanny Pack though which is pretty epic in it's own right)
  • MERMAID HAIR DON'T CARE Makeup Bag ( A gift from someone else... some kind of theme going on here. Also No Longer Available - similar HERE)
  • YOU GOT THIS GIRL Notebook (Crucial for random ideas / inspiration / grocery lists. Similar HERE)
  • EOS Sweet Mint Lip Balm (my go to lip balm since High School)
  • Black Envelope Style Bag (Thrifted / Vintage - similar HERE )

Tuesday, November 7, 2017

My TWIK Look

Back in October I partnered up with the store Simon's for the Brand TWIK through Chick Advisor
 ( I actually got the first E-mail regarding this campaign on my Birthday, which made for a very special Birthday Surprise!)

If you are not familiar with this Store yet I do recommend you check it out! A Canadian Fashion Retailer since 1840, that started in Quebec & now extends through the Country! The closest store to me is in Ottawa at the Rideau Centre - so obviously I had to get in there to check it out when I first got word! It's loaded with great Designers & Brands! The brand TWIK however is a Brand New addition to the store(s) & such a high quality one at that! They carry classic timeless pieces of phenomenal quality ( & next level softness) that like a best friend will be with you for life! If all of that wasn't enough, they even have select pieces in the line with profits going to Marine Mammal Research, so  RUN not walk to check it out!

speaking of... I'd like to thank My Best Friend & photographer extraordinaire! Who I can seriously always count on to get a great shot despite my insane uncomfortability (not a word)). I was feeling pretty under the weather, add in the fact that I had just accidentally stabbed myself pretty severely in the palm while attempting to carve a pumpkin the day prior (note the clenched hand in almost every shot) making me that much more awkward.

I had a lot going on personally / health wise in October, & I while I may not have been necessarily feeling stylish or inspiring, I was so excited about this opportunity that I knew I had to find a way to make it work! I am sharing this because I just wanted to say thank you! I am very grateful for the people in my life who surround me with encouragement, support, for holding me accountable to my goals, and motivate me to reach out of my comfort zone, & dream bigger!

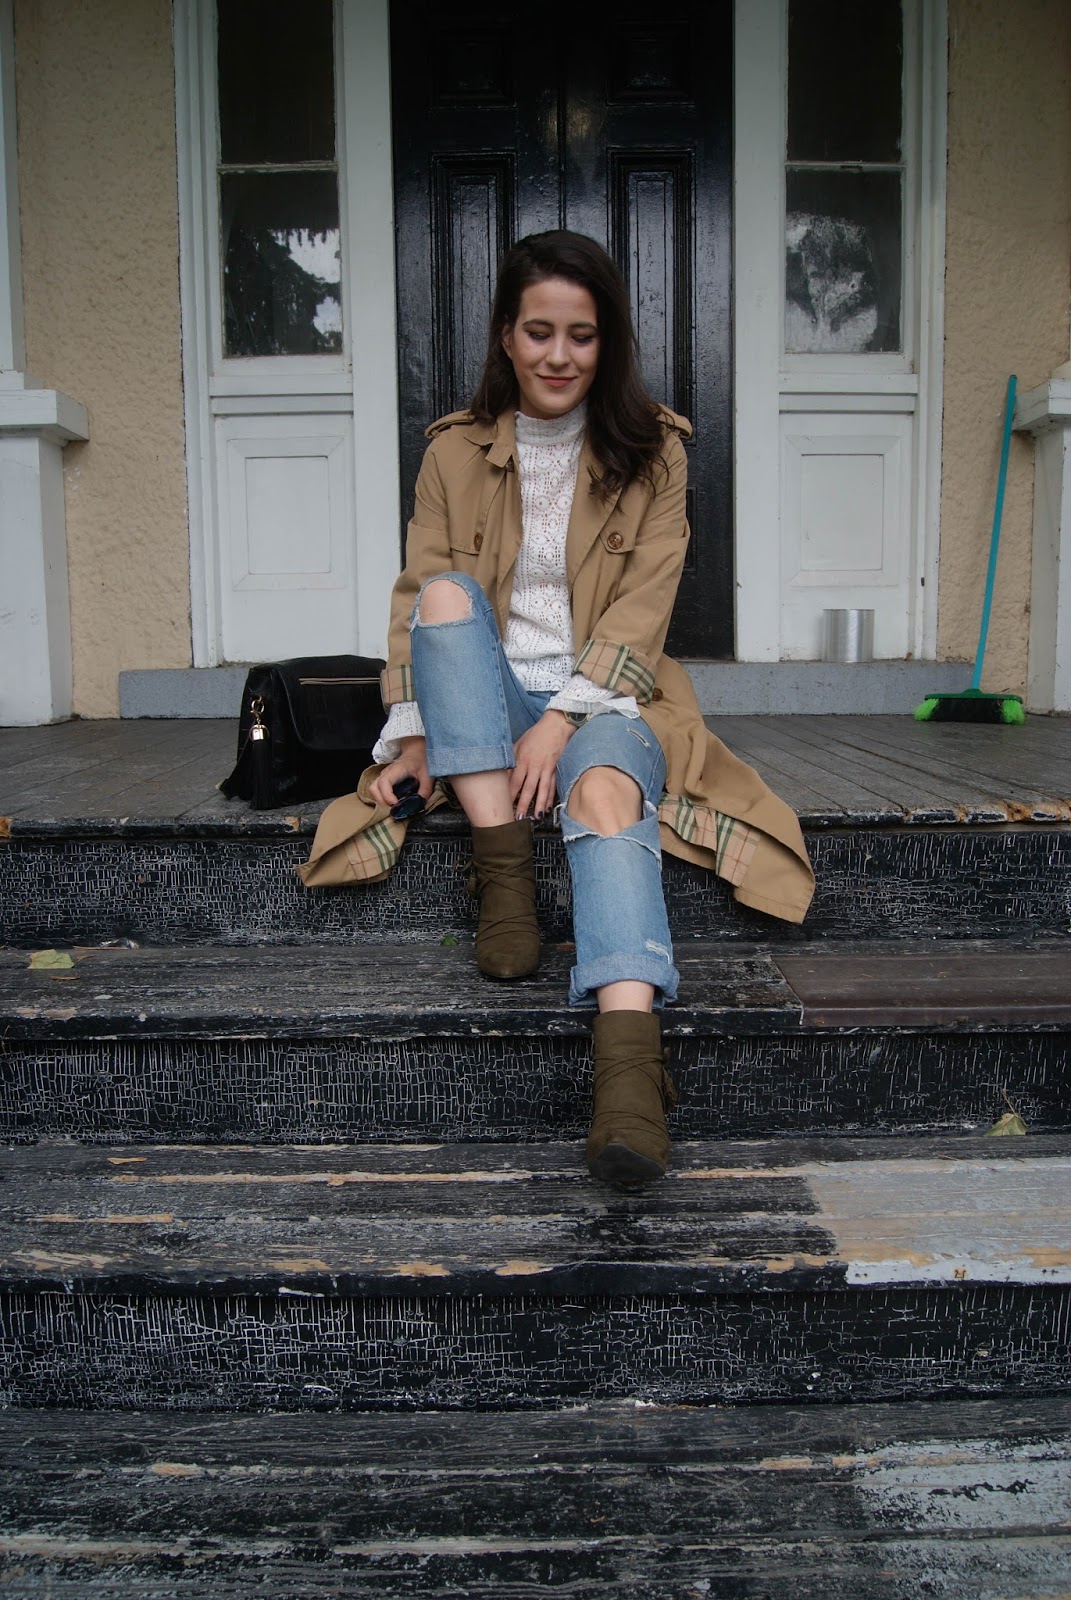
Medallion Mock Neck Top worn casually;
Styled with Ripped Jeans, Hunter Green Ankle Boot, & Trench Coat


Medallion Mock Neck Top Business Casual;
Styled with Blush Slacks, Nude Pumps, & Blush Accessories 

Crushed Velvet Dress Casual;
Styled with a Denim Jacked & Thigh-High Boots.

Crushed Velvet Dress-ed Up;
Styled with Black Pom Pom Heels & a Gold Choker Necklace. 


Button Back Tee (exact pattern Sold Out) Lazy/Casual;
Styled with Black Ripped Jeans 

Button Back Tee (exact pattern Sold Out) Business Casual;
Styled with Black Pencil Skirt, Open Toe Shoe, Taupe Leather Bomber Jacket 
Sponsored
A massive Thank You to SIMONS Canada & Chick Advisor for the opportunity!

Monday, October 30, 2017

DIY Unicorn & Meadow Costumes


Happy Halloween Week!


I remember when Halloween used to mean dressing up with all of your best friends and siblings, grabbing the largest pillow case you could get your hands on and hitting the streets until your parents called "Last House". At this point it was home to the living room to bump out ALL of he loot we had acquired. Am I the only one who used to sort it all out item by item? I even went so far as to dump all the sour candies into one zip-lock bag. Now it's just drinks the weekend closest, handing out the candy we once collected. I won't lie, this is going to be my first year handing out candy (from my own home) & I am actually DO excited about it! & then scoring as much as our inner child wants the morning of November 1st when it ALL goes on clearance!

This month has been quite the whirl wind for me personally. I fell sick with at the start of October & spent the days surrounding my Birthday at the hospital. Just as I began to feel like myself again our house got hit with an awful cold/ cough that just can't take a hint that its unwelcome here!
But with the bad there is always good, like celebrating a relaxing Birthday & Thanksgiving with Family & cake. Getting new glasses. Sight is something I am VERY Grateful to have again, & seriously had no idea just how much of the worlds beauty I had been missing without them! I am having mixed feelings about the fact that I now have to sport glasses daily to have said vision.. It will be nice to no longer unknowingly ignore people in public who are out of my 2 foot vision radius.
I
n any case, I think we could all use an excuse to let go of ourselves, the stresses of life and anything that might be bringing you down. Let's play dress-up for a while like the old days!


This is the first holiday in our new home & being back in our hometown again, & I think the fact I started decorating for it in September means that I was a pinch excited!

 Tomorrow is Halloween Night & if you are still deciding on a costume you can find 12 last minute costume ideas HERE & HERE, as well as flawless cosmetic costumes HERE


The Galloping Dead
(Zombie // Dead Unicorn)

Self Love Cultivated Through ; Self Love, The Process of Art, & An Attitude of Gratitude 

Friday, October 27, 2017

Undead Mermaid Coffin Wreath & Halloween Decor

This year I wanted to switch it up from the traditional Halloween colour scheme. Summer was so slow to arrive & with how mild the start of Fall has been I wanted to add a Pop of colour & whimsy! We spend a lot more time in the space in the Fall compared to the Summer, but I wasn't quite ready to say goodbye to the Beach ... or fully invest in the Deep Fall Tones. 
I decided on an Undead Mermaid Inspired Theme. I figured this was the best of both worlds allowing me to include neon and pastel colours, as well as things that would hold onto that Summer mood a bit longer, like Seashells & Coral! While also leaving room for me to introduce as much or as little Horror / Creepy Halloween vibes as I wanted! 

I do love the classic look of the Traditional Fall Colours, and Orange and Black Halloween classics. Like not wanting to fully invest in Fall, I also didn't want to invest too much into a slew of new / different decor pieces. I decided to up-cycle a few items I already had that I hadn't made use of in years prior, because while I do carry-over some items year to year, I do like to switch things up. My rule of thumb is that if it wasn't used in that season the year prior it likely will not be used again (as is) & is ready to be re-worked into something new!
Some thing's take more work than others... I challenged myself at the start of this project to make use of what I already had as MUCH as possible, included but not limited to using packaging as a base.


Supplies Needed:
~ Needle
~ Scissors
~ Pom Poms
~ Cardboard

~ Paint Brushes ~ Small Notebook
~ Finishing Thread
~ Paint (mix of colours)
~ Hot Glue Gun & Refills

~ Plastic Skull & Bone Beads

How To: 


I simultaneously gave a quick sprucing to a bunch of super inexpensive plastic mini pumpkins I found in my Holiday storage simply by applying a few coats of paint in pastel colours.

 The Wreath was made with deconstructed pieces of this weird Skull Necklace Thingy I also found in storage - not even sure why I had this or where it came from, maybe some forgotten costume of the past.

Painting Prep

Step 1. After taking the Skull & Bone Beads I gave them a few coats of paint with the same pastel shades!

Step 2. The Wooden Coffin will also need to be painted. ( I went with a bright blue with a teal undertone )

Creating Details 

Step 1. Using a Needle & your choice of finishing thread, thread Pom Poms, as well as Skull, & Bone beads.

Step 2. 
Continue this process until you have created 2-4 various lengths of hanging whimsy (as seen below)

Tassels Made Easy. 

Step 1.
Wrap some finishing thread around a notebook about the same length width as you would like your tassel to be long. Wrap more, or less to create a larger, or smaller Tassel.


Step 2. tuck a piece of finishing thread under & pull through. Drag to the bind of the book & tie tight to secure.

Step 3. (not pictured) use scissors to cut your tassel Free, Fold over at the secured point and wrap in a small piece of finishing thread of detail ribbon to finish. 


Prepping the Coffin 
Once painted I was free to add the details of whimsy, I had originally planned on including some seashells, but the ones I had ended up being a bit too heavy & wasn't ready to risk the whole thing smashing to the floor (or onto my cat who often lays RIGHT in the doorway) I added some bright feathers, which I just really liked the colours of & the way the softness looked against the crudeness of the casket (not something you read often here, or anywhere)

Step 1. Using Hot Glue I quite literally glued the piece of card-stock that my PomPoms had originally come in to the back of the coffin across the top!

Step 2. The feather were actually Clips, which made attaching them very simple!

Steps 3/4.  Cut off ANY access / exposed cardboard from both sides (don't want to ruin the illusion)

Step 5. Using your glue Gun again, apply a small dollop of glue where you would like your 'details' to hang from.

Step 6. Tie a small loop of finishing thread and secure it to the top (back) of the Coffin to hang.


Step 7. Write a cute / creepy / top secret message inside for anyone who dares to Open!!!